How To Sell on Amazon for Beginners: Easy Steps To Get Started
No matter what you want to sell, Amazon FBA — Fulfillment by Amazon — can help you reach more customers and close more sales. Whether you represent yourself or a thriving business, you can sell your products across Amazon’s stores, including Amazon.com. Particularly if you’re just starting a small business, the last thing you want to do is focus too much of your time on small fulfillment details. Storing your inventory, shipping products, and return processing can easily become a full-time job.
Amazon FBA helps to effectively replace product-related stress with peace of mind. They help streamline customer service — from packaging through customer service — giving you the freedom to further grow your business.
- Why You May Want To Start Selling on Amazon
- How To Get Started
- Step 1 — Find Profitable Products
- Step 2 — Set Goals
- Step 3 — Start With a Free Amazon Seller Account
- Step 4 — Purchase the Products
- Step 5 — Create Effective Product Listings
- Step 6 — Manage Inventory
- Step 7 — Interact With Customers
- Step 8 — Keep Track of Everything
Why You May Want To Start Selling on Amazon
There are many reasons why you might want to sell products on Amazon. Maybe you’re looking to make a little extra money from the comfort of your own home. You might be a student looking to split time between coursework and a budding online business. Whether you’re looking to make money from a part-time college business or a full-time company, selling on Amazon can place your products in front of the right eyes.
You can achieve a number of benefits simply by selling your products on Amazon. By marketing your goods to millions of active Amazon customers, you can quickly grow a customer base. Sell products to anyone, anywhere in the world, with Amazon’s certified distribution. When you sell on Amazon, you won’t need to worry about moving stock or communicating with a warehouse. Amazon coordinates the movement of your products, allowing you to concentrate on the executive aspects of your company.
How To Get Started
You’ll need to satisfy a few steps before you can begin selling products on Amazon. Between seller’s fees and product payments, you might also need to satisfy a few startup costs before your products go live online. Often, you’ll need to provide Amazon with samples of your products before your business is approved to operate through FBA. In addition to sample costs, you’ll typically need to provide Amazon with a minimum order quantity (MOQ). You’ll need to provide Amazon with a certain number of products — often 500 individual units — before your store listing is approved.
Make sure you’ve obtained any necessary trademarks before your business opens. If you plan on running promotions, product specials, or bundles, you’ll also need to account for these costs before transactions begin. Check the details below for more information on the steps required to start selling on Amazon.
Step 1 — Find Profitable Products
First, determine how to successfully sell your products on Amazon. Even if you’re confident in the quality of your products, you’ll want to conduct market research to confirm any assumptions. Before you begin selling on Amazon, you’ll also need to identify how you’re going to turn a profit. Many Amazon FBA sellers make money by taking advantage of price differences between different markets. Known as retail or product arbitrage, this process sees a seller purchase products from one market and resell them in another market for a higher price.
If you’re interested in a more traditional Amazon FBA sales model, you might opt for the product supplier model. Product suppliers typically sell inventory from well-known brands after purchasing discounted products in bulk. After you settle on a profitable sales model, you can move forward with the Amazon FBA selling process.
Step 2 — Set Goals
No matter your business type, setting goals is an excellent way to build confidence, create sales, and promote accountability. Before you sell your first product on Amazon, take some time to outline goals for your business. For best results, keep goals concrete and actionable. Use specific metrics and frame your goals with wording such as: “Over the next 90 days, I want to sell 25% more Product X inventory by revising product listings in ways that will interest more consumers.” You’ve now created a goal with a quantifiable end result, a time frame, and the steps you’ll follow to achieve success.
Step 3 — Start With a Free Amazon Seller Account
Currently, Amazon offers two different FBA seller account types: Individual and Professional. The Individual plan is entirely free to create, though you’ll pay Amazon $0.99 every time one of your products sells. You can use this free account to generate and remove product pages in the Amazon catalog, though you can’t access inventory feeds, manage orders, or run promotions. You also can’t allocate user permissions to other company members or calculate taxes with the free plan.
If you’re unsure about selling on Amazon, you can always try a free seller account before you commit to the paid version. Once you begin to find success on the Amazon FBA platform, transition to a paid account for more control over your sales. The paid seller plan costs $39.99 per month, though you aren’t charged the $0.99 per-product cost every time one of your products sells. Known as the Professional plan, this account allows you full control over your Amazon storefront. You can access full inventory reports, set your own shipping rates, and control your API through the Amazon Marketplace Web Service. When you’re ready to create your Amazon seller account, navigate to the Amazon seller portal to enter the required details.
Step 4 — Purchase the Products
Once you’ve created your seller account, it’s time to secure your products and prepare them for sale. Purchase the products you know customers will want, using the market research you performed to prioritize certain product offerings over others. After you purchase products, you may need to prepare them for sale. Whether you’re adding creative product labels or taking high-quality photos for product listings, make sure your products are 100% ready to be sold before marketing them through Amazon FBA.
Budgeting is especially important during this time since you might need to spend a significant portion of your finances on initial inventory. Save records after every purchase you make; keep track of expense reports, inventory pricing, reorder forms, and any other financial records you should be keeping.
Step 5 — Create Effective Product Listings
Product listings on Amazon FBA contain a name, description, image, and other valuable details for each product you sell. When choosing between your product or an alternative, customers are likely to consult your product listings before making a final decision. Take your time when creating product listings so that each listing showcases the best features your product offers. Keep product titles shorter than 200 characters and capitalize the first letter in each word. Provide any other clarifying details in your product title — including product dimensions, color, or the number of items per package.
In your product description, Amazon allows you five bullet points to further explain product specifics. Use popular industry keywords here so that your product appears in relevant product searches across Amazon. Include benefits customers receive when using your product, to help them envision a happy post-purchase outcome.
Use clear, high-quality product images in your listings, preferably with white backgrounds. Keep in mind many customers will zoom in on your product images to get a better look at your products. Product images should be at least 1,000 DPI (dots per inch) so that they maintain their integrity when customers enlarge them.
Step 6 — Manage Inventory
As your products begin to sell, make sure you keep your inventory sufficiently stocked. Sometimes, inventory takes time to replenish, especially if new products come from manufacturers overseas. Amazon uses your sales volume, fulfillment center capacity, and other factors to determine your allotted inventory storage. Typically, new sellers — and sellers with slower-moving inventory — will have stricter storage limits.
If your products experience an uptick in total sales, Amazon will likely improve your inventory capacity to meet new demands. Amazon reviews each seller’s allotted storage space each month. Your business is eligible for a storage space increase as long as you sold at least 8% more of your inventory every week for a nine-week period.
Step 7 — Interact With Customers
Don’t overlook customer interactions; as potential customers might have questions about the products you sell. In other cases, you might need to spend time managing reviews that customers have left. To keep consumers happy and preserve your online reputation, it’s important to interact with customers in an uplifting, professional manner.
Responding to customer reviews — especially negative ones — is one way to show them you take their concerns seriously. Select the “Comment” button next to the review and be sure to clearly identify yourself as the seller. Some customers might leave product questions directly on your product pages. Take time regularly to check for new customer questions, and provide clarifying answers that address any of their queries.
If you need to communicate directly with a buyer, you can do so securely through Amazon’s Buyer-Seller Messaging Service. Accessible to all sellers on Amazon FBA, this tool will help you respond to a variety of customer concerns.
Step 8 — Keep Track of Everything
Between inventory management, budgeting, customer service, and other important priorities, selling through Amazon FBA may feel complicated. You can mitigate a lot of this confusion when you keep track of business details. If you’re managing the majority of your business from home, take steps to keep your home office organized. Clear your desk of unnecessary paperwork, move cords into the corners, and keep walkways clear during the day. If you can spend even a few minutes preserving a clean workspace, you’ll find yourself better prepared to face any other business challenges.
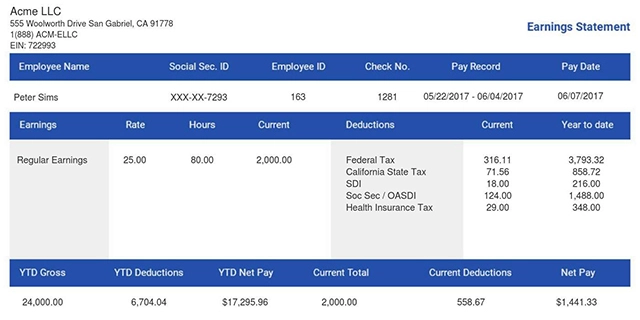
It’s also important that you keep track of your mental sanity. Running a company — even if it’s a small, part-time business — can be stressful. Take breaks, listen to music, and spend time with loved ones to keep stress to a minimum. Once your Amazon sales increase, you might find that running payroll is one more responsibility your navigating. You might consider trusting an instant paystub generator to consolidate payroll and make financial record keeping easy.
- 1. Enter Your Information

- 2. Select Your Favorite Theme

- 3. Download Your Stub!